Hello friends
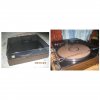
Just got a entry level turntable Pioneer PL 12D which was not in service when I picked it up. I decided to do the minimum required service to get it running and up. This is how it looked initially. The dust cover is cracked but still functional and serving the intended purpose.


I had technics SL 1600 direct drive turntable earlier and on opening the hood of the pioneer i got a very rude shock. I was so used to the PCB in the technics that it thought that somebody had removed some parts from the turntable. It had a box type plinth with a vinyl sheet pasting over it giving it the look of a cheap wood. The box plinth was empty devoid of any complex electronics.

Got down to the task of giving it TLC. Started with the top plate by giving it a wipe with a damp cotton napkin. Next cleaned the tonearm with a wet earbud. I took care that the earbud was not dripping so as to avoid any unwanted fluid in sensitive places.
Then came oiling the motor. It is very simple procedure. Two drops of oil in the earmarked place. It can be seen in the photo as a red triangular arrow.

In the above photo you can see the motor and the pulley. Since it is an AC motor, the RPM is controlled by the frequency of the power supply. Turntables with such motors had 50hz and 60hz pulley for controlling RPM of the platter. You can also see the 33 to 45 speed change guide.
Then the centre spindle was unmounted by removing a screw from the top. The spindle assembly can only be removed from the inside for which you have to open the top plate. The top plate is held in place by two screws which can be slided towards the spindle.


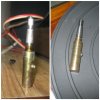
The spindle is held in bearing well by a grub screw on the side. The spindle can only be removed if you remove the grub screw. A little force is required as pulling the spindle out creates a mild vacuum which creates a mild resistance.
The spindle and the well were cleaned using cotton only. Take care while cleaning as there is a small bearing inside the well which needs to be removed carefully otherwise you might lose it. It was fortunate that i had opened the spindle as it did not have any oil in it.
A small squirt of Honda Activa synthetic gear oil was used in the bearing well. After the oil was put in the brass well, the spindle would not sit in it. I temporarily installed the spindle again without the grub screw and mounted the platter. I kept some cloth underneath the spindle for the excess oil that would spill out. The indication that the spindle is sitting in the well perfectly is that on tightening the grub screw, it would not restrict the rotation of the spindle.


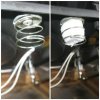
The top plate is balanced on four springs. To damp the springyness, it is recommended that you use foam inserts and some rubber washers under the springs. I made the rubber washers using a discarded bicycle tube. The top was levelled using different number of washers under the four springs.

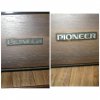
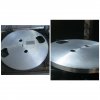
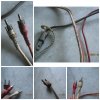
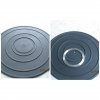
Then polished the rubber mat, platter, dustcover and cleaned the cables. Some before and after pictures.
Just got a entry level turntable Pioneer PL 12D which was not in service when I picked it up. I decided to do the minimum required service to get it running and up. This is how it looked initially. The dust cover is cracked but still functional and serving the intended purpose.


I had technics SL 1600 direct drive turntable earlier and on opening the hood of the pioneer i got a very rude shock. I was so used to the PCB in the technics that it thought that somebody had removed some parts from the turntable. It had a box type plinth with a vinyl sheet pasting over it giving it the look of a cheap wood. The box plinth was empty devoid of any complex electronics.

Got down to the task of giving it TLC. Started with the top plate by giving it a wipe with a damp cotton napkin. Next cleaned the tonearm with a wet earbud. I took care that the earbud was not dripping so as to avoid any unwanted fluid in sensitive places.
Then came oiling the motor. It is very simple procedure. Two drops of oil in the earmarked place. It can be seen in the photo as a red triangular arrow.

In the above photo you can see the motor and the pulley. Since it is an AC motor, the RPM is controlled by the frequency of the power supply. Turntables with such motors had 50hz and 60hz pulley for controlling RPM of the platter. You can also see the 33 to 45 speed change guide.
Then the centre spindle was unmounted by removing a screw from the top. The spindle assembly can only be removed from the inside for which you have to open the top plate. The top plate is held in place by two screws which can be slided towards the spindle.


The spindle is held in bearing well by a grub screw on the side. The spindle can only be removed if you remove the grub screw. A little force is required as pulling the spindle out creates a mild vacuum which creates a mild resistance.

The spindle and the well were cleaned using cotton only. Take care while cleaning as there is a small bearing inside the well which needs to be removed carefully otherwise you might lose it. It was fortunate that i had opened the spindle as it did not have any oil in it.
A small squirt of Honda Activa synthetic gear oil was used in the bearing well. After the oil was put in the brass well, the spindle would not sit in it. I temporarily installed the spindle again without the grub screw and mounted the platter. I kept some cloth underneath the spindle for the excess oil that would spill out. The indication that the spindle is sitting in the well perfectly is that on tightening the grub screw, it would not restrict the rotation of the spindle.


The top plate is balanced on four springs. To damp the springyness, it is recommended that you use foam inserts and some rubber washers under the springs. I made the rubber washers using a discarded bicycle tube. The top was levelled using different number of washers under the four springs.


Then polished the rubber mat, platter, dustcover and cleaned the cables. Some before and after pictures.


Attachments
Last edited:


