The lockdown Lenco L75 rebuild

stevieboy

Well-Known Member
Joined
May 28, 2008
Messages
2,354
Points
113
Location
bangalore
C06F23F4-5909-4F34-9E4D-DCC1756B5D80.jpeg


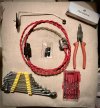
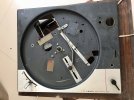
Dug out my Lenco L75 which has been lying around. Time to rebuild and restore it. This will be a budget restore. Just the bare minimum required to get it running properly. However no half measures in the motor and bearing area. So motor inspection and lube or whatever is required, bearing inspection and whatever is required, idler wheel is plastic but will do for now, spark suppressor cap to be replaced. I’m junking the lenco tonearm cos the rear was off and I don’t want to handle rewiring this completely. So first step took off all the tonearm bits and bobs, the collar nut was a struggle till WD 40 helped loosen it and pliers did the rest. Removed the brake too since it was grating on the platter. Don’t use a brake on my Garrard either, it’s there but angled away from the platter rim. I’m also rewiring an SME 3009 Series II tonearm which will be used with this till I have funds and figure out a final tonearm for this deck. Hence the temporary plinth will be my own design of independent pieces of layered ply stacked where space dictates under the top plate for now just like bricks to hold it up and drain the vibration. This will be a leisure rebuild no hurry. Lots of reading to do on the lenco site for motor structure drawings mainly. Restoring these decks is work but a hell of a lot of fun and so much learning too.
 
Saw this coming. All the best Steve ! Lot of L75 punters here as well. I think one FM has a multi layered plinth ready as well with a cut for an SME 3009 and to let go. Let me check and get back.

Keep them progress updates coming.
 
All the best Steve..looking forward to this, Am sure you have all the materials and information and hope you have fun !
On the plinth, please make sure the space under the central part of the top plate has a platform underneath and you screw the top plate that as well. that drains the vibrations very well.
Thanks Arj,

The mounting was one thing that left me mildly puzzled as how the screws would be fitted into the wood underneath, then I saw I think it was Ropie's plinth plans where he says to screw the pan to the wood layer underneath. There are three holes available at 12 o'clock, 6 o'clock and 3 o'clock in the pan so should be easy to do also should be easy to drill a hole through in another area if required. One question could you clarify or point me to reasoning as to why most Lenco's are only in high mass plinths? Cos to me it seems to be this way cos Nantais advocated this approach while Loricraft advocated squash balls and both became popular but I can't reason out why squash balls wouldn't work on a Lenco as it does for the Garrard. High mass works yes, but why only this and not squash balls? The high mass adds 'weight' to the presentation because the Lenco motor is not as powerful as the Garrard's and the high mass added weight helps matters? It's the only thing I can think of. I'm trying to search online to find some answers. I have a funky plinth idea that will drain the top plate vibration but does not involve so much wood, the top plate screwed onto vertical independent columns of layered wood layers and these columns stand in an acrylic see through enclosure filled with beach sand, which contacts the wood columns and forms a bigger vibration drain sink. Or a single layer of wood resting on sand. Facing outwards inside the acrylic will be seashells I've collected. I'm tired of the bog standard wood rectangular plinths.

Also what lubricating oil do you use for the platter bearing? People seem to use all kinds! Will also need some grease for the motor bearing, will be barely a dab, wondering what kind to buy and where...

Yesterday was reading day, figured out how to lube and service the motor and other bits and bobs about how the Lenco is built and why. Today I took off the springs and ran the turntable, it turns. First time the idler wheel seemed to have forgotten its job and just sat there, I had to spin the platter with my hand and then it caught. After that it spins decently. Motor makes noise though.

Things to do:
1. Buy a soldering iron and solder the spark suppressor capacitor. It still looks good so hopefully won't have to buy a new one.
2. Get a main cable from Viren and wire the motor up with it like I did for the Garrard.
3. Buy an idler tension spring, the current one is way too stretched out. Apparently as per lencoheaven, its the motor springs that cause the motor cone and the idler wheel to connect strongly and the idler spring just brings the idler in contact but still its just too beat up to use I have currently stretched it and looped it around the post a quarter of its length shorter to increase tension and have the idler wheel move for now.
4. Service the motor. The platter bearing runs super smooth from a lube with 3-in-1 oil when I first got it, no noise. Will top up and stick to 3 in 1 oil for now.

Roughly checked the mounting distance for the SME. It seems to fit only at the 12 o 'clock position directly above the spindle, pointing directly to the spindle. Works better for me since the cartridge end will be easier to reach with the turntable placed with switches facing the user as intended, which I like.

Mat is serviceable as of now, but a bit on the hard side, later on will consider a new one.
 
Saw this coming. All the best Steve ! Lot of L75 punters here as well. I think one FM has a multi layered plinth ready as well with a cut for an SME 3009 and to let go. Let me check and get back.

Keep them progress updates coming.

Hey Sohail,

Do let me know, but right now I don't know whether the SME will be a permanent companion to the Lenco so a full on plinth isn't in the plans as of now.

Regards
 
The mounting was one thing that left me mildly puzzled as how the screws would be fitted into the wood underneath, then I saw I think it was Ropie's plinth plans where he says to screw the pan to the wood layer underneath. There are three holes available at 12 o'clock, 6 o'clock and 3 o'clock in the pan so should be easy to do also should be easy to drill a hole through in another area if required.
Yes Ropies plinth or most of the Moldovian plinth designs on ebay also have the second layer cut such that only the motor has a hole and the rest of the top plate sits on the wood and you will need to drill 3-4 additional holes and put in a wood screw to lock it in. Some folks have put a bituminous papers between it but i had not tried that.
I moved to a PTP so that got solved.

One question could you clarify or point me to reasoning as to why most Lenco's are only in high mass plinths? Cos to me it seems to be this way cos Nantais advocated this approach while Loricraft advocated squash balls and both became popular but I can't reason out why squash balls wouldn't work on a Lenco as it does for the Garrard. High mass works yes, but why only this and not squash balls? The high mass adds 'weight' to the presentation because the Lenco motor is not as powerful as the Garrard's and the high mass added weight helps matters? It's the only thing I can think of. I'm trying to search online to find some answers. I have a funky plinth idea that will drain the top plate vibration but does not involve so much wood, the top plate screwed onto vertical independent columns of layered wood layers and these columns stand in an acrylic see through enclosure filled with beach sand, which contacts the wood columns and forms a bigger vibration drain sink. Or a single layer of wood resting on sand. Facing outwards inside the acrylic will be seashells I've collected. I'm tired of the bog standard wood rectangular plinths.
I currently have a Garrard 401 as well and the main difference is the level of sophistication. The garrards have a far more sophisticated mechanism for their motor island as well as the idler. The Top plate is also very well designed .

The lenco is far more rudimentary by design unlike the gararrd which is well balanced as a single unit. hence while the squash ball works well for the gararrd, the lenco needs more mass else you get too much rumble since the motor is not well isolated, is in a lighter mass suspension but much more powerful..maybe it needs a heavier mass to control the motor vibrations ( I read somewhere that the plinth does not damp it but absorbs it)
Again too much mass damps the sound so while nantais went overboard he makes it work because of the several other tweaks he does to tune the sound ! so the standard 4-5 layers are good enough.

Also what lubricating oil do you use for the platter bearing? People seem to use all kinds! Will also need some grease for the motor bearing, will be barely a dab, wondering what kind to buy and where...
I had bought a bearing oil i bought from one of a sellers on Lencoheaven ! this oil needs to be light. I suspect This should be good. input 2-3 drops and thats good for a very long time ( maybe once in 6 months ? )


Yesterday was reading day, figured out how to lube and service the motor and other bits and bobs about how the Lenco is built and why. Today I took off the springs and ran the turntable, it turns. First time the idler wheel seemed to have forgotten its job and just sat there, I had to spin the platter with my hand and then it caught. After that it spins decently. Motor makes noise though.

Things to do:
1. Buy a soldering iron and solder the spark suppressor capacitor. It still looks good so hopefully won't have to buy a new one.
2. Get a main cable from Viren and wire the motor up with it like I did for the Garrard.
3. Buy an idler tension spring, the current one is way too stretched out. Apparently as per lencoheaven, its the motor springs that cause the motor cone and the idler wheel to connect strongly and the idler spring just brings the idler in contact but still its just too beat up to use I have currently stretched it and looped it around the post a quarter of its length shorter to increase tension and have the idler wheel move for now.
4. Service the motor. The platter bearing runs super smooth from a lube with 3-in-1 oil when I first got it, no noise. Will top up and stick to 3 in 1 oil for now.

Roughly checked the mounting distance for the SME. It seems to fit only at the 12 o 'clock position directly above the spindle, pointing directly to the spindle. Works better for me since the cartridge end will be easier to reach with the turntable placed with switches facing the user as intended, which I like.

Mat is serviceable as of now, but a bit on the hard side, later on will consider a new one.
Cleaning the motor is very very important as is replacing the plastic idler wheel with a metal one..ideally the 5 hole one and not the 2 hole one. I think I have a spare on. I have even experimented with a titanium wheel :). And as far as mats go, having experimented with many, the Lenco original is the best
I even experimented with the tweak of removing the spring and substituting with a weight on a pulley but never got that to work well.


On the mains cable ..does not really matter much during early stages hence use finolex or any other computer cord till you fine-tune it.
The key is Motor-Idler-Platter-Spindle link ...None should have a play else you will find a wobble on the platter and that takes work to get right( thats where the garrards are superior)

The one area where the lenco is superior to the garrard is in its platter. i believe far better designed as a zinc alloy unlike the aluminium one from garrard
 
Thanks Arj,

The mounting was one thing that left me mildly puzzled as how the screws would be fitted into the wood underneath, then I saw I think it was Ropie's plinth plans where he says to screw the pan to the wood layer underneath. There are three holes available at 12 o'clock, 6 o'clock and 3 o'clock in the pan so should be easy to do also should be easy to drill a hole through in another area if required. One question could you clarify or point me to reasoning as to why most Lenco's are only in high mass plinths? Cos to me it seems to be this way cos Nantais advocated this approach while Loricraft advocated squash balls and both became popular but I can't reason out why squash balls wouldn't work on a Lenco as it does for the Garrard. High mass works yes, but why only this and not squash balls? The high mass adds 'weight' to the presentation because the Lenco motor is not as powerful as the Garrard's and the high mass added weight helps matters? It's the only thing I can think of. I'm trying to search online to find some answers. I have a funky plinth idea that will drain the top plate vibration but does not involve so much wood, the top plate screwed onto vertical independent columns of layered wood layers and these columns stand in an acrylic see through enclosure filled with beach sand, which contacts the wood columns and forms a bigger vibration drain sink. Or a single layer of wood resting on sand. Facing outwards inside the acrylic will be seashells I've collected. I'm tired of the bog standard wood rectangular plinths.

Also what lubricating oil do you use for the platter bearing? People seem to use all kinds! Will also need some grease for the motor bearing, will be barely a dab, wondering what kind to buy and where...

Yesterday was reading day, figured out how to lube and service the motor and other bits and bobs about how the Lenco is built and why. Today I took off the springs and ran the turntable, it turns. First time the idler wheel seemed to have forgotten its job and just sat there, I had to spin the platter with my hand and then it caught. After that it spins decently. Motor makes noise though.

Things to do:
1. Buy a soldering iron and solder the spark suppressor capacitor. It still looks good so hopefully won't have to buy a new one.
2. Get a main cable from Viren and wire the motor up with it like I did for the Garrard.
3. Buy an idler tension spring, the current one is way too stretched out. Apparently as per lencoheaven, its the motor springs that cause the motor cone and the idler wheel to connect strongly and the idler spring just brings the idler in contact but still its just too beat up to use I have currently stretched it and looped it around the post a quarter of its length shorter to increase tension and have the idler wheel move for now.
4. Service the motor. The platter bearing runs super smooth from a lube with 3-in-1 oil when I first got it, no noise. Will top up and stick to 3 in 1 oil for now.

Roughly checked the mounting distance for the SME. It seems to fit only at the 12 o 'clock position directly above the spindle, pointing directly to the spindle. Works better for me since the cartridge end will be easier to reach with the turntable placed with switches facing the user as intended, which I like.

Mat is serviceable as of now, but a bit on the hard side, later on will consider a new one.
See post #10 for motor power figures.

Loricraft v/s Jean Nantais high mass: Loricraft plinth is the classic plinth (a box with hollow inside) whereas Nantais found out that mass loading lessens the rumble of the powerful Lenco motor. @arj had pointed out the importance of tight coupling of the pan of L75 top plate to the plinth. Drill extra holes in the pan area and screw it down. One can experiment further with squash balls even below a high mass plinth. Caveat: the weight distribution of TT motor + plinth is never uniform, so some legs will see heavier loading than others, leading to troublesome leveling.

Platter bearing oil: compressor motor oil is often recommended on LH but I came up totally blank in my search for such oil.

Motor greasing: lithium grease bought from bike parts store + Singer sewing machine oil. Grease to be avoided for platter bearing as it will fill the pores of sintered bronze bearing. I used Singer sewing machine oil for some time but felt it was not viscous enough and I felt it actually accentuated ticks and pops when playing.

Idler wheel spring: elastic bands used for clothing (say, 5 mm band) actually works great till you can get steel springs. Since the platter needs a push the idler wheel spring is clearly loose. You can cut the spring a bit and make a fresh loop.

Power rewiring: do make sure you add ground wiring too. Instructions available on LH.
 
So spent some more time reading up and figuring stuff out. Played the turntable again just on the box, the top plate vibrates a lot.
Adding springs back in helped minutely, not much. Added two beat up squash balls which I had lying around and much better, the plate vibrated less. Now I get why the PTP came into existence. Have decided to try squash balls, and sand in socks moulded under the recesses of the top plate, mounted on basic round feet I have lying around and then heavy blocks as support and see what differences I can hear. Will take the longer more scenic route on this one. From what I can make out, this seems to be one big area where fiddling around will result in tuning the sound so worth spending some time and trial and error on to educate myself. When I used to have a CD player, some weight on the top would help, so maybe a bit of weight on the top plate where the tonearm was might help too... Later on, even something like Herbie's feet to absorb vibration might be a sound experiment... These might be worth trying for the Garrard also...

Now that I've got a fair hang of what the Lenco is about, will get down to servicing the motor. Located lithium grease on amazon will order that along with circlips pliers if my needlenose pliers don't work on the circlips. Found the now redundant spring from the tonearm lift mechanism that seems to be good so perhaps that will serve as the idler spring for now. The idler arm could use some work too, looks too long and vibration prone. Meanwhile will also order the coupling rubber for my SME tonearm.

@ Arj, Re the mains cable I have to go with my final one itself cos I plan on soldering it directly to the switch. Even my Garrard I wired direct. Both have strain relief so I found it ok. Won't be using an IEC plug, so no way I can change cables later on without the hassle of resoldering.
@ Josh, yes the mains earthing point will do. It's similar to the Garrard.

The mat has become hard like plastic. Again will listen to it for a while before getting a new one to see what differences I hear.
 
So spent some more time reading up and figuring stuff out. Played the turntable again just on the box, the top plate vibrates a lot.
Adding springs back in helped minutely, not much. Added two beat up squash balls which I had lying around and much better, the plate vibrated less. Now I get why the PTP came into existence. Have decided to try squash balls, and sand in socks moulded under the recesses of the top plate, mounted on basic round feet I have lying around and then heavy blocks as support and see what differences I can hear. Will take the longer more scenic route on this one. From what I can make out, this seems to be one big area where fiddling around will result in tuning the sound so worth spending some time and trial and error on to educate myself. When I used to have a CD player, some weight on the top would help, so maybe a bit of weight on the top plate where the tonearm was might help too... Later on, even something like Herbie's feet to absorb vibration might be a sound experiment... These might be worth trying for the Garrard also...
Are you still placing it on its original plinth ? If you are, then take it out and place it on 4 bricks (on the corners), it will sound better without it
Once you get your new plinth and you screw in the top plate it will become as good as a PTP.
 
Hi Arj,

Yes its currently in the plinth I got it in as a temporary place holder so the internals hang loose in space safely without getting damaged. This is only till I fully service it and get my tonearm ready and can actually start playing it. I won't use it for actual play, its way too resonant to use in any real way.

Regards
 
Hi all,

The VA of the Lenco motor is 15. If the motor is considered as a 100% reactive load, the PF (power factor) shall be 1, hence the motor wattage shall be 15. If part of the motor load is inductive, the PF shall be <1 which would make the wattage <15. The G301 motor is 16 watts, while the G401 is 12 watts.

With reference to this L75 project, IMO the top priority should be replacing the plastic idler. It shall cause rumble and loss of torque, overall a serious degrading of performance. A new idler from Russia or Italy, suitable for 3 mm axles, can be considered. Another option would be to replace the entire idler arm with one that has a 2.5 mm axle and a metal idler wheel. Retaining that plastic idler shall be like overhauling a car while not replacing old, bald tires.

It is also better to turn the idler arm grommet. Explanation for this suggestion is here.
(Note: link provided as I have deleted these pics at my end)

The mounting distance for the SME3009 does not match that of the the original arm. The sunken platter shall create difficulties in adjusting correct arm height. These issues should be considered. In fact, for medium to low compliance cartridges like the Denon DL103, the original arm is better suited than the SME3009, which was designed with high compliance carts in mind. The SME scores on looks, but the original is no slouch in performance. Someone on Lencoheaven is even pairing a Lyra with it.

HTH
 
Hi Analogadikt,

Thanks for weighing in!

Yes will be replacing the idler wheel, one touch and you know just how flimsy it is hehe. I have not come across any information on the 2.5mm idler shaft being better than the 3mm but then I haven't particularly researched this aspect either so far. Do you mean to say the 2.5 would be better? If so, could you share some more light on the reason why and what sound benefit is achieved? Or did you mean switch to 2.5mm shaft cos the 2.5mm shaft comes standard with the metal idler wheel?

Hadn't come across turning the idler grommet thanks for that tip will go through that link!

As regards the arm, the reason I took it off is one, to be able to turn the turntable easily for repairs looking at it etc and secondly my arm requires some work and right now I don't want to tackle it so I'll ponder it at the next stage. The difficulty in drilling out the headshell connector end pin to do a rewire is what made me pause and keep it for a second stage poke and fiddle. It does seem to be well made yes very similar to the SME and I think I read on the net someone on a forum saying that SME designed or built it for them? I don't normally junk anything till I've heard it myself but the work involved right now...Plus the Lenco arm will require money... V blocks, headshell leads, wire for a rewire hence parked for now. :rolleyes:

The SME will be mounted independently off the turntable directly behind the spindle, a rough measurement of mounting distance indicated that it would be ok there. And since it's independent mount I can adjust the height to the sunken platter accordingly. Since I've already done an SME rewire I'm comfortable taking that up to pair with the Lenco till I decide a permanent tonearm for it. Plus I can use that one arm to see the differences between the Garrard, Lenco and my ProJect turntables keeping the arm/ cart/ phonostage variable constant. That's one experiment I've always wanted to do.

Could you tell me what the mass of the stock Lenco arm is and up to what weight of cartridges it can handle? How good is the Shure 91ED that came standard with it? Worth putting in a new stylus to use it?

Regards

Also are these grommets available to buy new? Or does this rubber part hold up well in long term storage without use and just rotating it 90 degrees will solve the problem?

Edit: I found new grommets available at the netherlands store that also makes tonearms I had come across years back. For those interested https://audio-creativeshop.nl/product/lenco-grommet/#reviews

Any rubber part ought to be hard by now and replacing certainly should reap some benefits is my thinking, especially one that holds the idler arm itself. A hard grommet would transfer vibrations from the pan directly into the idler arm and thence to the wheel. Also conversely, I'm thinking the rotation of the idler wheel would transfer some vibration into the attached idler arm and the rubber grommet again would help damp this, in addition to the damping on the idler arm.
 
Hi stevieboy,

It is question of idler bush and axle size mismatch and not of quality.

The plastic idler shall have a 3 mm bush with a matching axle on the arm. The Lenco metal idlers have a 2.5 mm bush with a matching axle on the idler arm. Please measure the axle size on your Lenco, my guess is 3 mm. If you buy a replacement metal idler, whether original Lenco or aftermarket manufacturers' it shall have a 2.5 mm bush which won't match the 3 mm axle on your idler arm. The workaround shall be to replace the idler arm with a newer one that has a 2.5 axle, or order an idler with a 3mm bush from the aftermarket suppliers.

There is are discussions regarding the grommet on LH.

Your idler arm probably does not have the split type bush that I have shown on page #3 there. It is probably the older pop rivet style, which makes removal difficult.

Regards,
 
I have always preferred buying the idler + arm + Gromit combo so its just a plug a play literally. Have a titanium one and a regular steel one as backup :)

As a tweak putting plumbers tape on the arm reduces vibrations travelling via that . @Dr.Bass had done some research and found that the 2 hole idler wheel is the best !
 
Thanks so much for the offer Anil! So far seems doable. Caught up with some other stuff, so taking this slow. The only bottle neck will be soldering the tonearm wire to the headshell. I had Philip in mind, the technician George had got for us at a meet once to show us how to solder, I know where his shop is. Let's see when that time comes.

Regards
Philip is a good guy. He can help you with that. Are you planning to use the old tonearm or replacing it?
 
A beautiful, well-constructed speaker with class-leading soundstage, imaging and bass that is fast, deep, and precise.
Back
Top