Does this qualify as a passive stereo preamp ? :-)

Amarendra

Well-Known Member
Joined
Oct 25, 2010
Messages
1,111
Points
113
Location
Mumbai
After getting the Norge power amp, I was missing out on volume control for my LP player. Hence was wondering whether I should go for something like Schiit Sys. However availability is a problem and as usual the prices in India are sky high. I also came across Khozmo pre amps where the preamp boxes were practically empty (but cost upwards of EUR 400) which fascinated me. So started hunting on the net for something more on DIY lines.

Came across a thread where a simple potentiometer was introduced as a volume control between source and power amp. Hence placed an order for an ALPS circuit board and an ALPHA 10k log potentiometer. Had to download some diagrams since I had no clue as to what is ground, IN, OUT or L/R in a volume pot. I did not go for an ALPS pot since I was not sure what I was getting into.

I tried the initial connection with a single core wire that was lying at home. I did not have the guts to introduce it directly in the chain hence introduced it before my integrated amp to see if it worked with the integrated acting as a volume control for testing.
Quite surprisingly the pot worked with just a bunch of wires (see pic)
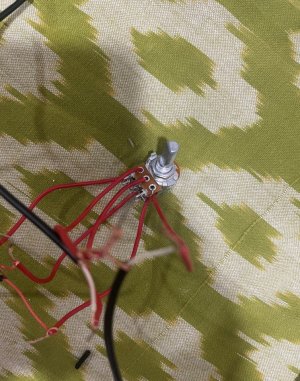
Pot 1.jpg

Next was putting it into the circuit board and testing without the soldering & it worked:
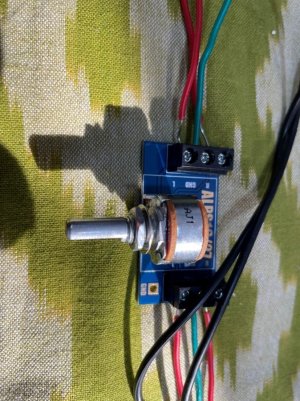
Pot 2.jpg

Next came my weak point- soldering - however managed in 10 min without burning the plastic :)
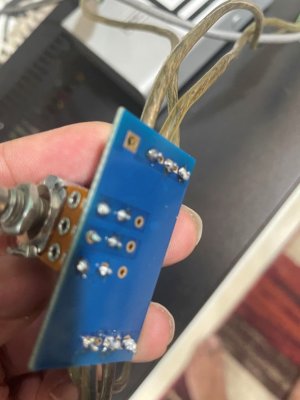
Pot 4.jpg

Present avatar with the circuit board and some RCA plugs:
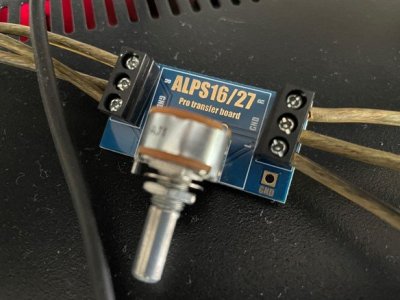
Pot 3.jpg

Finally introduced it into the main chain with the Marantz TT - Norge Power amp and the KEF LS50 Meta. The sound is very clear. Next I checked it between my iphone- Schiit Modi+ DAC and the Norge Power Amp. Again the sound was very very clear and loud and I got a feeling that I was listening to the Schiit DAC directly without any coloration. The analog dial also gives the feeling of power under the hood (under the Norge) as compared to digital volume controls with those infinity knobs :-).

Overall cost of my "hi-end" preamp has been INR 300-350.

If I need to introduce anything in the circuit please let me know.
DIY seems to give me far more satisfaction and joy than buying expensive stuff. I also tend to love the DIY stuff more than the ready made stuff. So next project is going to be a simple amp. Back to my "Electronics for dummies" book :-)
 
After getting the Norge power amp, I was missing out on volume control for my LP player. Hence was wondering whether I should go for something like Schiit Sys. However availability is a problem and as usual the prices in India are sky high. I also came across Khozmo pre amps where the preamp boxes were practically empty (but cost upwards of EUR 400) which fascinated me. So started hunting on the net for something more on DIY lines.

Came across a thread where a simple potentiometer was introduced as a volume control between source and power amp. Hence placed an order for an ALPS circuit board and an ALPHA 10k log potentiometer. Had to download some diagrams since I had no clue as to what is ground, IN, OUT or L/R in a volume pot. I did not go for an ALPS pot since I was not sure what I was getting into.

I tried the initial connection with a single core wire that was lying at home. I did not have the guts to introduce it directly in the chain hence introduced it before my integrated amp to see if it worked with the integrated acting as a volume control for testing.
Quite surprisingly the pot worked with just a bunch of wires (see pic)
View attachment 86962

Next was putting it into the circuit board and testing without the soldering & it worked:

View attachment 86963

Next came my weak point- soldering - however managed in 10 min without burning the plastic :)
View attachment 86964

Present avatar with the circuit board and some RCA plugs:
View attachment 86965

Finally introduced it into the main chain with the Marantz TT - Norge Power amp and the KEF LS50 Meta. The sound is very clear. Next I checked it between my iphone- Schiit Modi+ DAC and the Norge Power Amp. Again the sound was very very clear and loud and I got a feeling that I was listening to the Schiit DAC directly without any coloration. The analog dial also gives the feeling of power under the hood (under the Norge) as compared to digital volume controls with those infinity knobs :-).

Overall cost of my "hi-end" preamp has been INR 300-350.

If I need to introduce anything in the circuit please let me know.
DIY seems to give me far more satisfaction and joy than buying expensive stuff. I also tend to love the DIY stuff more than the ready made stuff. So next project is going to be a simple amp. Back to my "Electronics for dummies" book :-)
Where is this available
 
If I need to introduce anything in the circuit please let me know.
DIY seems to give me far more satisfaction and joy than buying expensive stuff. I also tend to love the DIY stuff more than the ready made stuff. So next project is going to be a simple amp. Back to my "Electronics for dummies" book :-)
There is no difference between this and the expensive passive preamps. You can splurge on the potentiometer if you are bitten by the audiophile bug. You can improvise further by adding a two pole selector switch and rca sockets all of which are easily obtainable. What you require is also a good aluminium box to fit all this inside. Unfortunately there is no good source of readily available boxes in India. Once upon a time you could get these boxes from aliexpress at a reasonable cost.

EDIT: The six soldering points where the terminals have been soldered, apply a bit of soldering flux and then solder. If you apply flux, the molten solder will form neat blobs. After the soldering is over, use a tooth brush and bit of IPA to clean the excess flux.
 
Last edited:
There is no difference between this and the expensive passive preamps. You can splurge on the potentiometer if you are bitten by the audiophile bug. You can improvise further by adding a two pole selector switch and rca sockets all of which are easily obtainable. What you require is also a good aluminium box to fit all this inside. Unfortunately there is no good source of readily available boxes in India. Once upon a time you could get these boxes from aliexpress at a reasonable cost.

EDIT: The six soldering points where the terminals have been soldered, apply a bit of soldering flux and then solder. If you apply flux, the molten solder will form neat blobs. After the soldering is over, use a tooth brush and bit of IPA to clean the excess flux.
Thank you- will try the flux. Soldering has always been a hit or miss for me :)
 
Thank you- will try the flux. Soldering has always been a hit or miss for me :)
You have soldered the potentiometers near perfect. Biggest enemy of neat soldering is oxidized surface and surface tension. Flux is a bit acidic. When heated it removes the oxidation and reduces the surface tension due to which the molten solder flows over the metal surfaces easily. You need around 1-2 seconds over the solder points in your particular pcb. Even upto 4 seconds should have been OK because you are not soldering transistors, IC, etc. Also don't solder when the iron is fully hot. When fully hot, if you shake your soldering rod the molten solder will fall on the floor. Another thing to care is the soldering rod tip. You should clean it with a file if it has got blackended and the surface area where the solder is staying has reduced. Just a bit of more practice and you will be a pro
 
Aluminium box might be better. It should be easy to find in a utensil shop
Thanks for this tip. Never thought about using a metal lunch box. Next project I'm definitely going to try this. Did manage to locate few candidates on amazon.
 
Basic question- how to cut into aluminium ?
You can use a metal cutting plier or electric cutter if you have one.


I have also made some amplifer cabinets back in the days that I used craft foam boad or mount board, which is available in Amazon, and also some of the stationary shops. (Now a days this thick board is available in hardware shops, which we all use in the kitchen cabinet backing.). This sheet you can cut with a cutting blade according to your size and stick with superglue. If you want a perfect finish, you can stick vinyl sheet on the top; it will look amazing in the end.

foam board
https://www.amazon.in/WORISON-SizeS...d=1728563100&sprefix=model+mak,aps,120&sr=8-9

glue
https://www.amazon.in/Pidilite-Inst...qid=1728563742&sprefix=flex+qu,aps,131&sr=8-1

viny sheet
https://www.amazon.in/s?k=vinyl+she...ix=vinyl+sh,aps,104&ref=nb_sb_ss_ts-doa-p_2_8
 
One lesson i've learnt through my audio journey, never judge an audio solution by price tags or by the expense incurred. If you can extract great results at a lower price point, you are the champ, if you can even go further and do so for little or nothing, you are the emperor. Folks spend millions on simplification, you've done it with some clever thinking, investing some time and a couple of hundreds. Well done!!

A small suggestion though, try Prem's idea. Using an aluminum or tin cab ensures proper shielding and grounding resulting in noise-free sound especially when playing at higher levels or listening to music with 'quiet' spots). Grounding the body of the POT with the cab is also recommended.
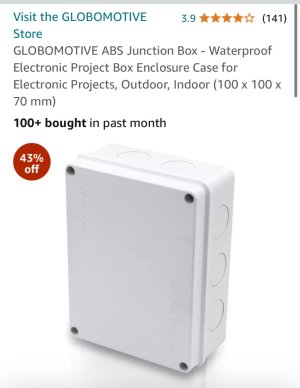
Thanks for your kind and encouraging words. Have received box enclosure today from Amazon. IMG_6212.jpeg
 
For making a preamp kind of thing one will just need to drill holes and that can be done with any drill with the appropriate drill bit
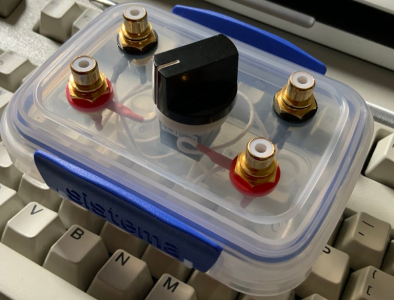
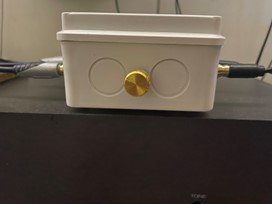
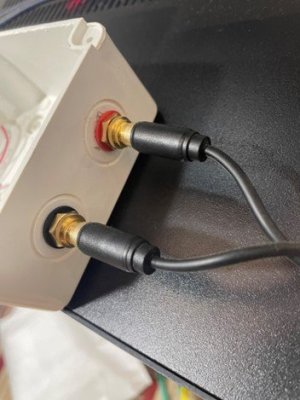
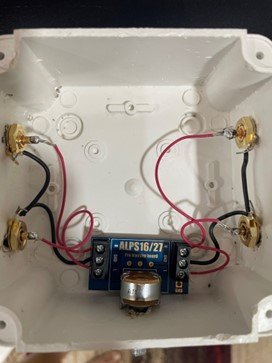
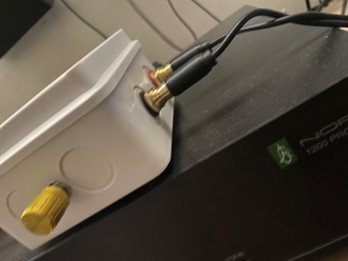
Happy to share that the preamp build is complete. It was slightly messy since I used a heated screwdriver to make holes. Also the plastic of the container was thick which took some space on the RCA plugs. For internal wiring i used the Belden RCA wire and for ground wire I used a single core wire. For RCA plugs i used REAN plugs.
Sound is good as ever and thankfully it worked. Soldering wasnt as challenging as anticipated. Thanks to all of you for making this possible.
Here are a few pics: (suggestions/ corrections welcome):
Amp 6.jpg
Amp 2.jpg
Amp 7.jpg
Amp 3.jpg
 
Aluminium box might be better. It should be easy to find in a utensil shop
I understand why you mentioned aluminium. The palstic is very thick and once melted it leaves a mess on the surface making it very uneven. I think I will shift the enclosure to metal. Thanks for your guidance.
 
Wharfedale Linton Heritage Speakers in Red Mahogany finish at a Special Offer Price. BUY now before the price increase.
Back
Top